FAQ
Quick Start
Use Get form from any Application:
-
The registration process is required the first time you enter the Workspace.
- - From the Formlinks Login, select "Sign up".
- - Enter your email address and select "Continue" or select Continue with Google, LinkedIn, or Microsoft 365.
- - Follow the prompts.
- - An access code will be sent to your email address for confirmation. You'll need to copy the code enter it at the prompt.
- Once you enter the Workspace, the import dialog will in the center of the page. Select the import button from the dialog box.
- A dialog indicates the Category and Application are installed when the import is complete. Select "Accept" to continue. The Category and Application will display in the left panel of the Workspace.
- You can use form directly from the Workspace by expanding the category and selecting the Application name. Fill out the form and select submit. A Record will appear in the Workspace.
- You can use Webform link by selecting "Publish Webform Link". Send the link to a user, and when they fill out the form, the Record will appear in your Workspace.
- You can also send links from existing Records or use them with Campaigns.
Formlinks Applications
Formlinks Applications are online and ready to use preconfigured solutions:
- Each Application has a Webform, generates a document, creates and updates Records, and is integration ready.
- The Webform, document, integration and Application properties are configurable and allows you to customize them to fit your needs.
- The underlying Record is digitized with Data Points, generated document, attachments, notes and activities that are securely stored with role-based access controls.
- If you cannot find a preconfigured app to get you started, then you can create a new Application. See the Help Guide for detailed information.
Formlinks Audience Membership
Formlinks audience are use membership groups that have three roles. There is one Owner, who is also a super user. There are some number of Co-owners, depending on the subscription level, that make up the remaining super users. Then, there are the Creators, of which both the Owner and Co-owner can be a member, and additional Workspace users may be available depending on the subscription.
- All Applications have one audience.
- That same audience can be assigned to multiple Applications.
- Other audiences can be made with different Co-owners and Creators if the total is within the number of Co-owners and Creators allowed for that subscription limit.
- When a user logs in to Formlinks, the Applications down the left side of the Workspace appear based on the user's membership, and the actions that can be performed on each Application are based on their roles in that audience.
Formlinks User Roles and Membership
Formlinks has configurable membership audiences and each audience has three user roles.
- Each Application is assigned an Audience. That Audience can be assigned to many Applications. When a user signs into Formlinks, the Aapplications for which they are members are displayed down the left side of the Workspace. Each audience has only one Owner role. The Owner requires one of the super user licenses. The only difference between Owner and Co-owner roles is that the Owner is the only member who performs billing operations and has the right to delete the entire set of Applications and Records.
- Each audience may have the number of Co-owners equal to the number of super users. One of the super user licenses is for the Owner. The Co-owner can manage all Application Properties, create and modify Applications including the Webforms and generated document, and perform any other Application level activity. The Co-owners may also work Records that are submitted to the Workspace.
- the number of Workspace users is indicated on the license and includes the super users. All super users may be in the Creator role. The Creator role allows these audience members to work with the Records submitted to the Workspace.
- There is no membership requirements for end users who select links from emails, Campaigns or those placed on web pages. Those users are challenged with one-time passcodes.
Formlinks Use Cases in General
There are hundreds, if not thousands, of use cases that Formlinks can support. Instead of discussing all possible use cases, here is a summary of the most common use cases.
- Webforms can be started directly from the Workspace by your team members.
- Webform links can be Published and placed on web pages for internal and external customers.
- Team members can send Webform links directly from Records to customers.
- Webform links can be sent to groups of users as Campaigns.
- Links can be sent through custom emails.
- You can create custom Applications or services to utilize the links.
- Use Inbound REST API and Outbound REST Event Driven Integration to get or put data in other systems.
Customize Document Layout, Format and Logo
Every Application will generate a document from the template when a form is submitted. Anything on this document template's layout, colors, logo can be changed. Use this Help Guide for detailed information.
-
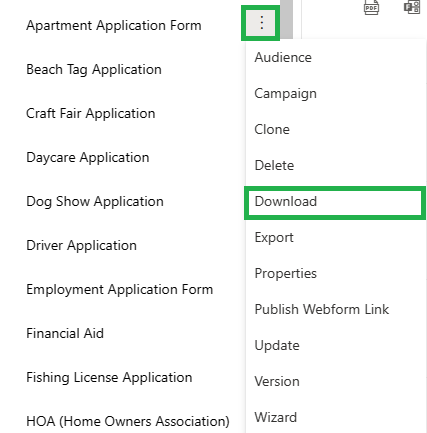
Select "Download" from the Application's context menu. You must be in Owner or Co-owner role to do this.
-
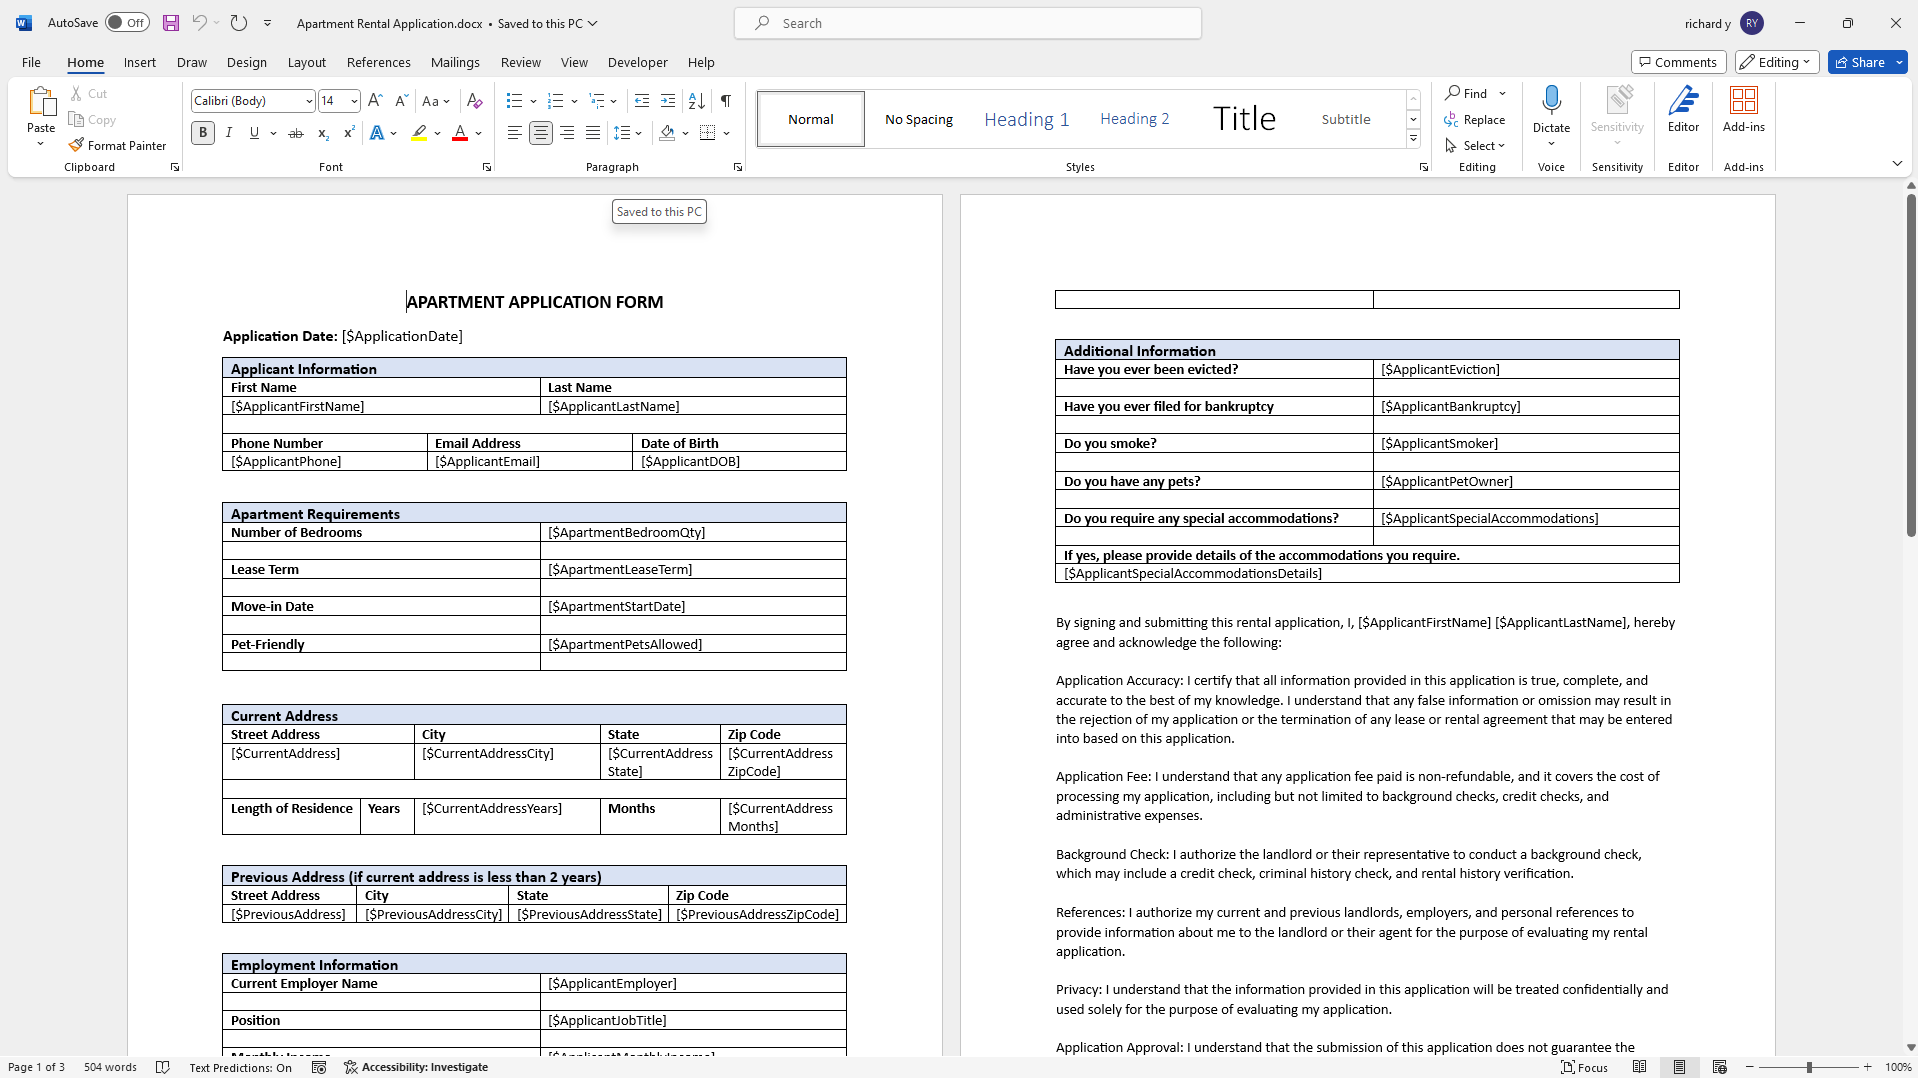
Open the downloaded document in Microsoft Word, make the changes and save.
No special editor is needed.
Add or remove images, edit text, edit formatting and the document will generate with all changes.
-
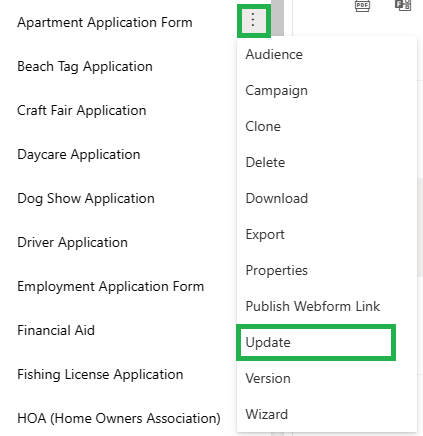
Select "Update" from the Application's context menu. You must be in Owner or Co-owner role to do this.
Note that the system will verify that you are updating the downloaded document that you have edited and will stop the update if an incorrect document or version is detected.
- Changes may take up to 5 minutes to take effect.
Customize Webform Labels and Controls
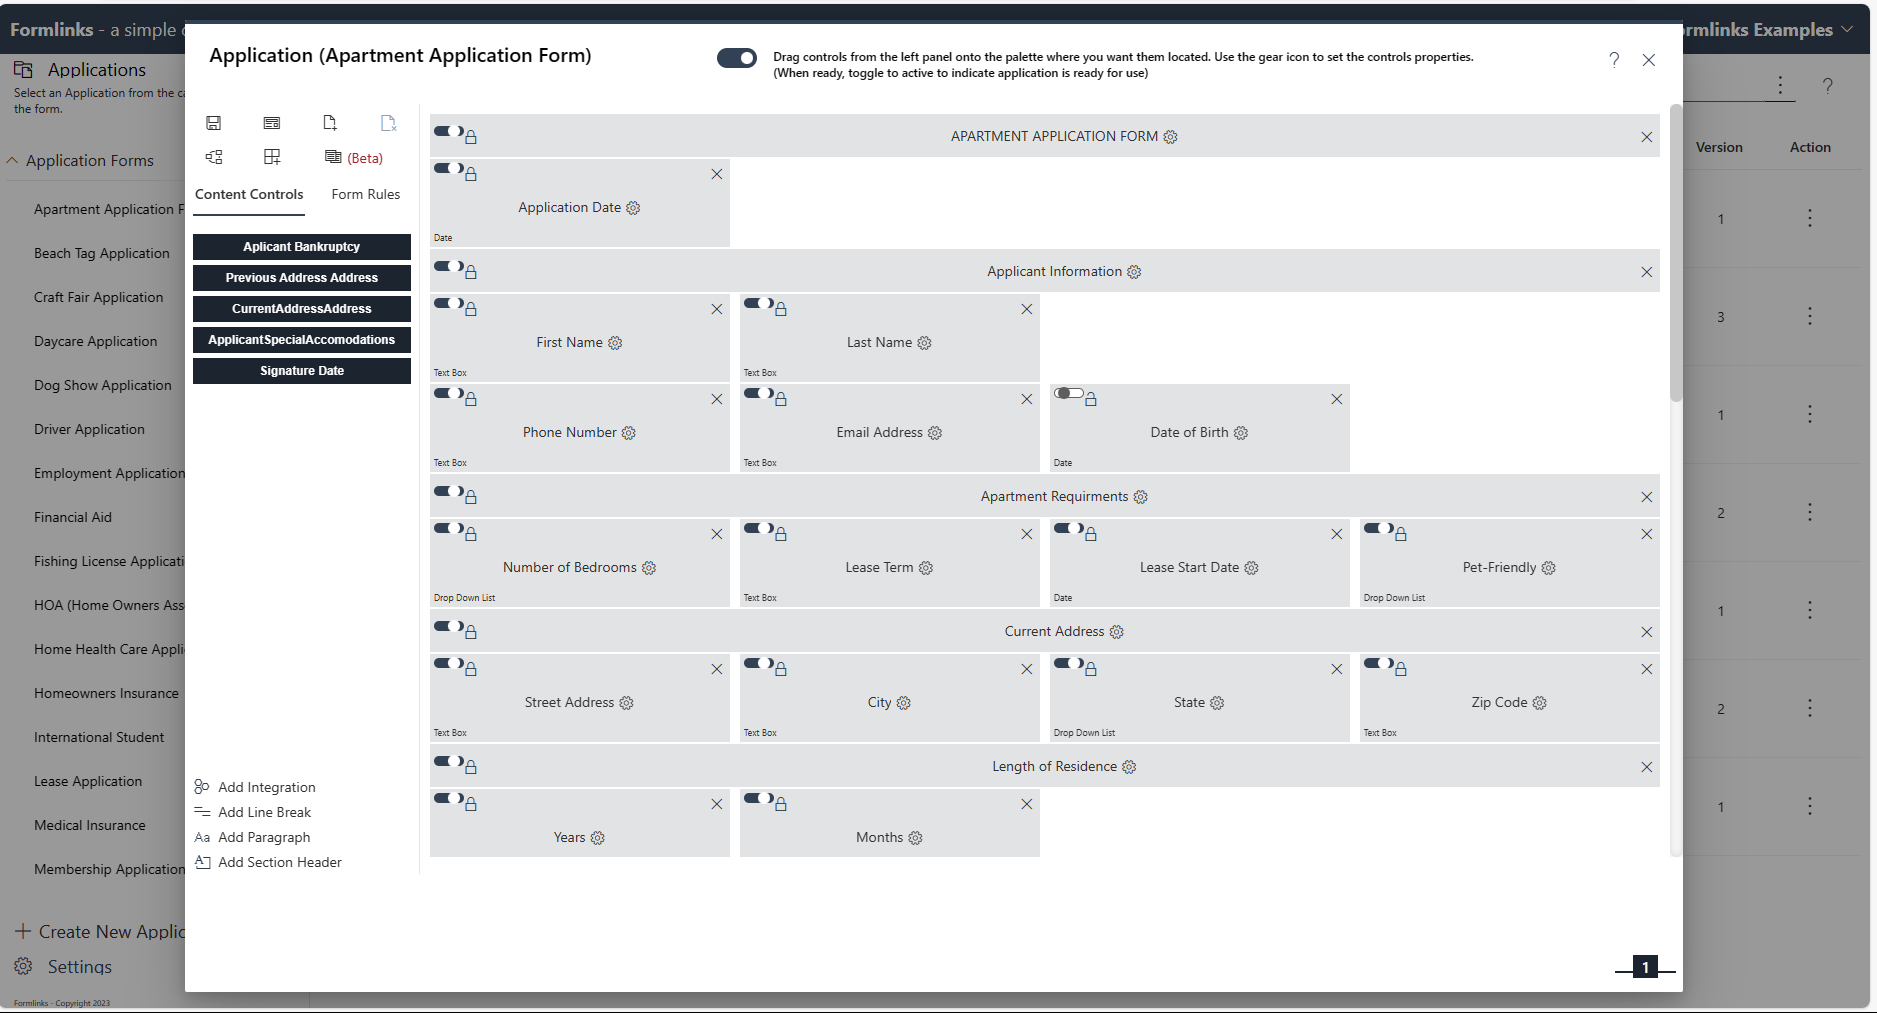
Use the Webform Wizard to edit form layout, Data Points, expressions, tabs and other parts. The Form Wizard is available from the Application's context menu. Use this Help Guide for detailed information.
-
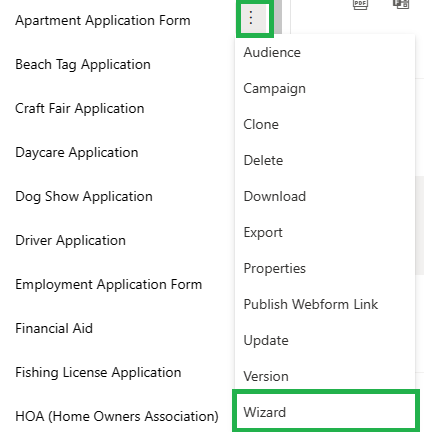
Select "Wizard" from the Application context menu. You must be in Owner or Co-owner role to do this.
-
You can preview your edits by selecting "Preview", which is located next to "Save".
When satisified with your edits, select "Save" on top left of Wizard page.
-
There is a toggle at the top of the page with "(When ready, toggle to active ..." in the description.
The Application and form will operate with the toggle off, and the Application will run slowly.
The Application link in the category appears in red.
When you are ready for production use, make the toggle active.

- Changes may take up to five minutes before the update takes effect once the form is toggled to active.
How to Add User to Application Audience Membership
Application audience is only for
Workspace membership access
which includes configuration and working with Records.
The super users are part of the base subscription and can be added to Co-owner and Creator roles.
Workspace users can be added according to the selected subscription limit and are applied to the Creator role.
The super users count for one of each of the Workspace licenses allowed.
Links being clicked by users accessed from web pages, emails and Campaigns are not added to the Application Audience.
Add additional Audience members by doing the following:
- Select the context menu for the Application and then select "Audience".
- Select "Add".
- Select Appication Audience for more information.
How to Apply Conditional Document Assembly Logic
Use conditional assembly to change text, insert text, delete text, append document, or prepend document to a generated document based on user input. Rules are configured to evaluate the inputs and apply conditional logic. For instructions, click here [link is coming soon].
How to Apply Conditional Form Logic
Use form assembly to hide/show, enable/disable and set default values on forms based on user input. Rules are configured to evaluate the inputs and apply conditional logic. For instructions, click here [link is coming soon].
How to Brand Customer Facing Forms
Forms that are opened from links that are published on web pages, sent from Records or sent through emails can have the form launch area branded. The form launch area is what you see when you select "Test form" from this site that has "Fromlinks Ready to Use Applications" at the top of the page. The launch area allows the title and the border colors to be changed.
- From the Application Context Menu, select Audience.
- Select the circled "i". When hovered, the tooltip says "See branding information".
- Edit the company name to change the title in the launch area to the desired title.
- Edit the background and foreground color to change the title bar and Webform border to the desired color.
- None of the other properties have any effect on the launch area.
- Do not forget to select "Update".
How to Change Billing Plan
If you need to upgrade or downgrade your billing plan to change the number of super users, new monthly submissions or storege limit, please follow these steps:
- Select "Settings" from the bottom left corner of the web page. You must be in Owner role to do this.
- Select "My Billing Plan".
- Select Plans.
- Select the plan that you want.
- Enter payment information.
How to Change Application Name, Category, Tooltip, Description and other Properties
Use Application Properties to set the Application category, name, tooltip, description, service email, audience and culture. Use this Help Guide for detailed information.
How to Configure Application Service Email Account
Use the service email account to send emails on behalf of the Application through a specified Office365 email.
- Select Properties from the Application context menu. You must be in Owner or Co-owner role to do this.
- Midway down the page on the right-hand-side, there is a toggle with "Use default KIM Email Service Account".
- Enter the email address you want to use and select "Save".
- An email will be sent to that account where you must perform the consent.
How to Configure Campaigns (send links to group of users such as annual compliance)
Any Application may be used for Campaigns and there can be any number of Campaigns running concurrently for an Application.
- Select "Campaign" from the Application context menu. You must be in Owner or Co-owner role to do this.
- You must have a service email account or access and credentials to set up an SMTP server to go to the next step.
- Select "New Campaign" and enter Name, Description, Subject, Initial Email and Reminder Email.
- Select "Respondents/Status" and then either "Upload User List" or "Add User".
- Select "General" and then check the box "Please activate this Campaign ..." at the top of the page.
- Select the start button at the bottom of the page and emails will be sent to respondents.
How to Create a New Application
New applications are initially generated from a Word document. Using Word, create or use an existing document with the appearance and format that you would like to appear. Tag the document with any Data Points using the tag format [$tagName]. Follow these steps below for a summary or use this Help Guide for more detailed information.
-
Use Microsoft Word to create a new document or open an existing document.

-
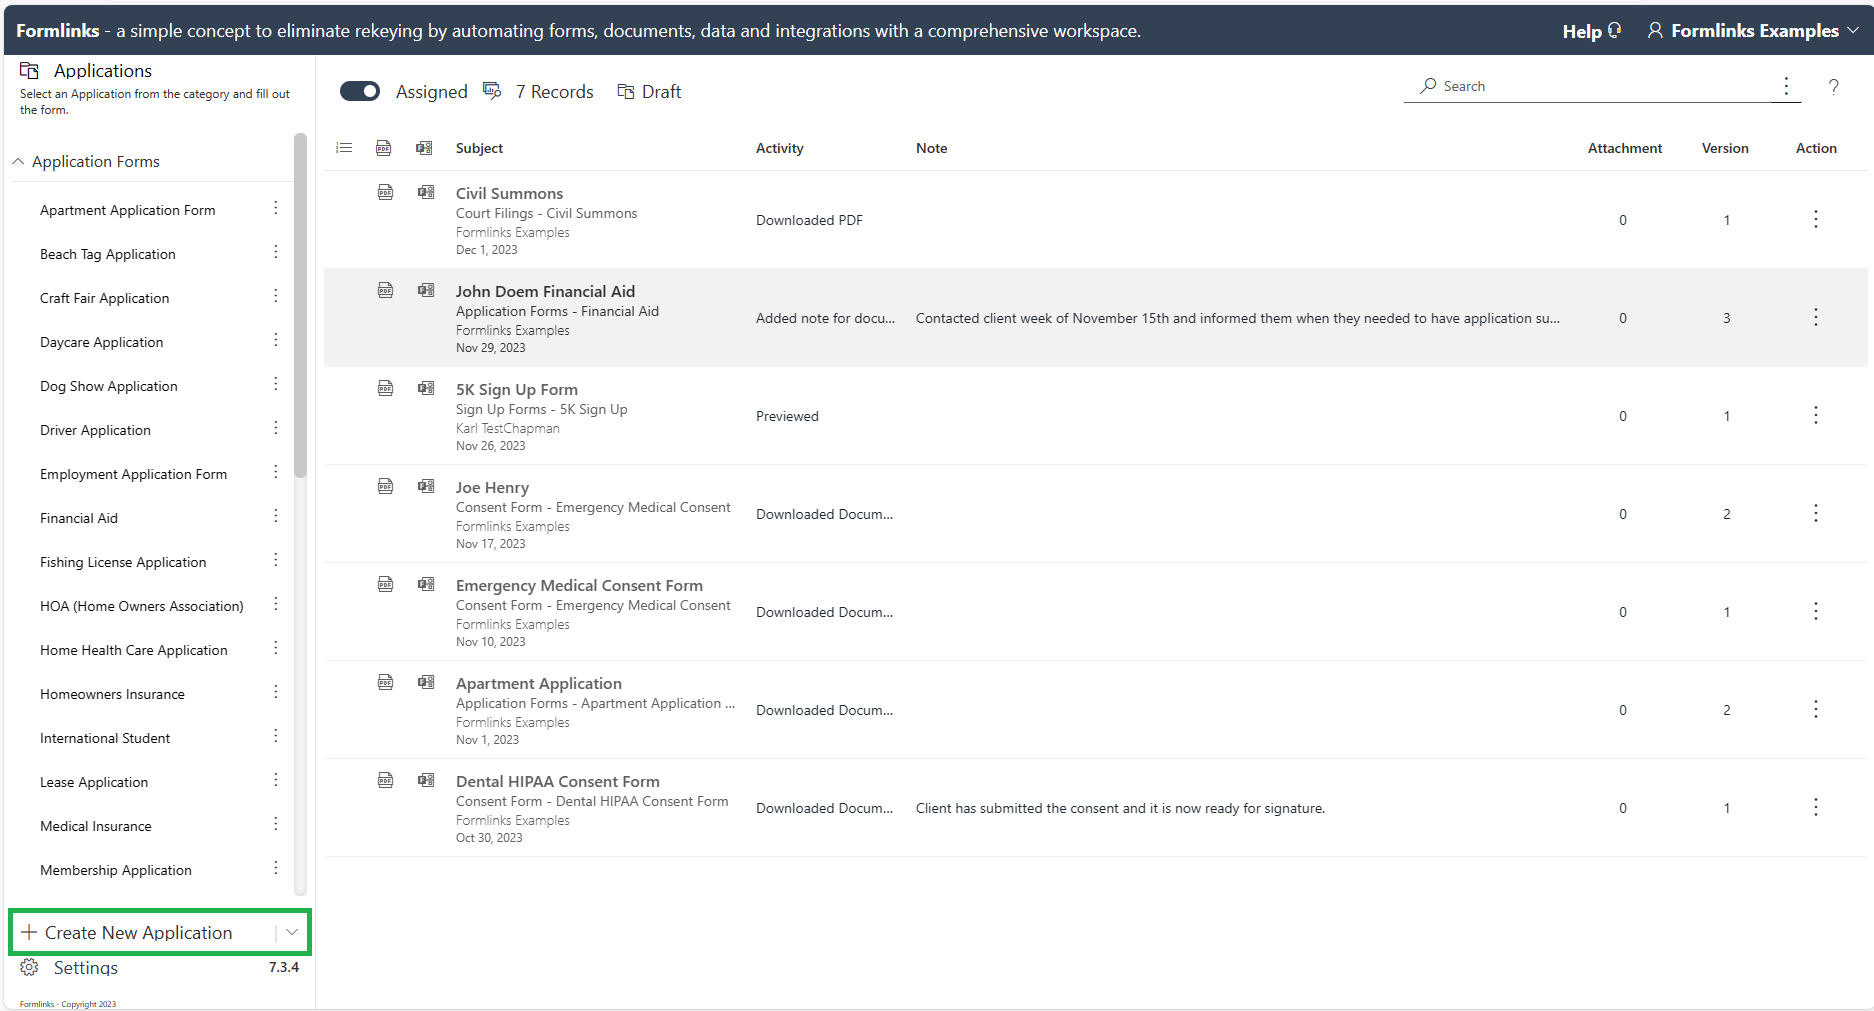
Upload the Word document using Create New Application which is located in bottom left corner of screen.
-
Fill the properties.
They can be changed later if needed.
For the audience, select the default from the dropdown list.
Select Choose file to upload the Word document.
-
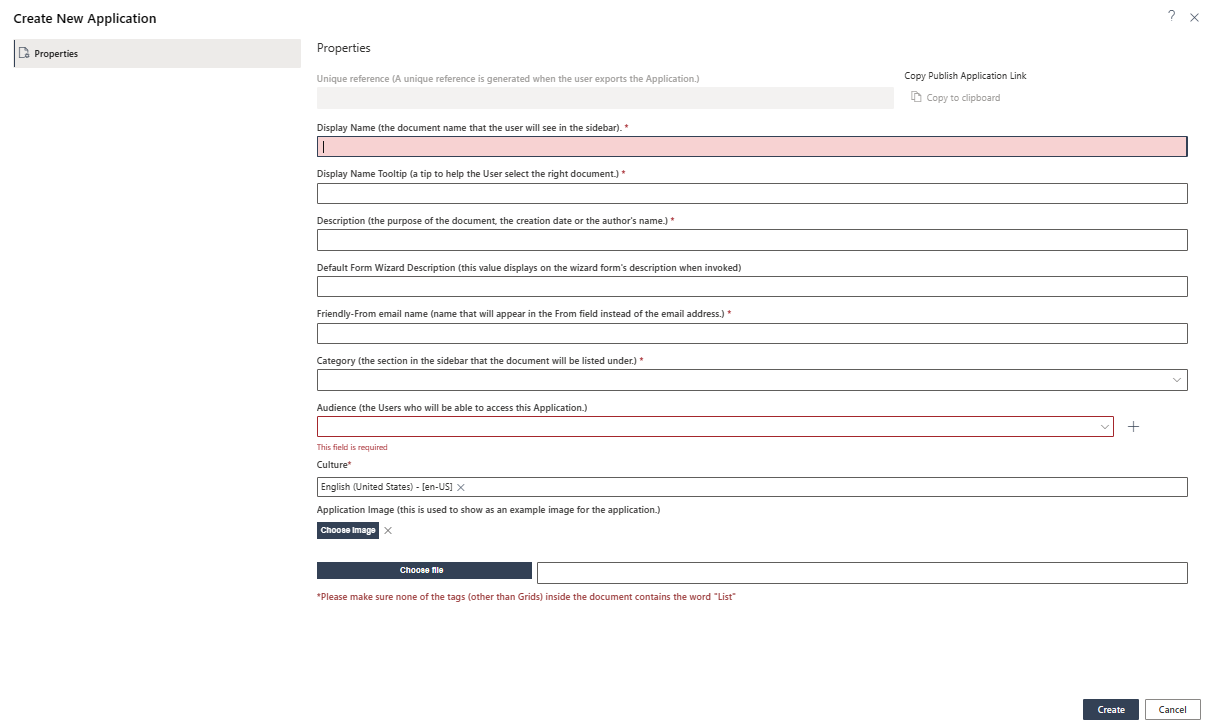
The Form Wizard automatically opens.
The tags are displayed down the left side of the page.
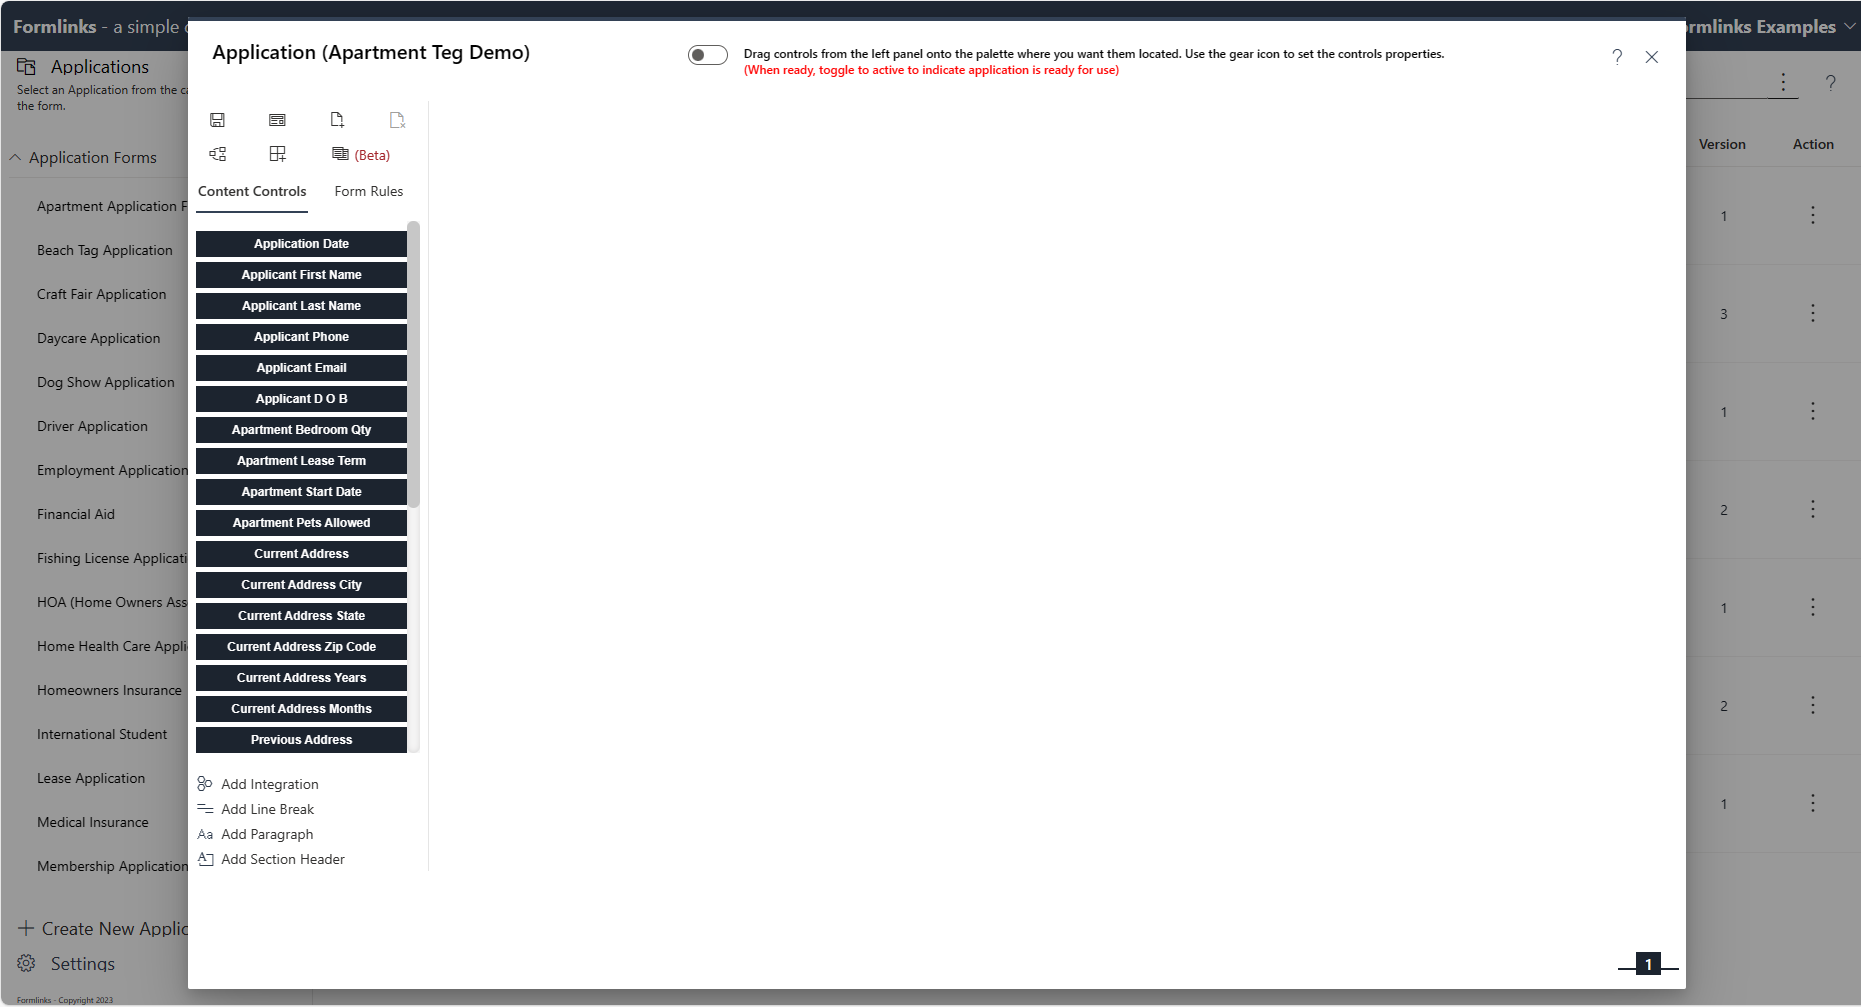
Now drag and drop the webform's layout.
-
Save the webform from the disk located at the left of the screen and then toggle the webform to ready. The application is ready to use.

How to Publish Webform Link (users select links from web pages)
Any Application can Publish Webform links. The links can be placed on web pages and sent through emails.
- 1. Select Publish Webform Link from the Application context menu . You must be in Owner or Co-owner role to do this.
- 2. An email will open and you can type instructions to send to the admin or client for what you want done with the link and press send.
How to Download User Responses to Excel
User responses can be downloaded in bulk. There are also other options to get data using Inbound API.
- Select the drop-down with your username on it from the top right of the Workspace e.g. us.examples@kimdocument.com.
- Select "Bulk Download"
- Select the Application you want to download the results of, and if Campaigns are available, you may then select a Campaign, and then select the XLSX option. If necessary, enter a date range.
- Select Download and the Excel spreadsheet will be emailed to you when finished processing.
How to Send Webform Update Link (send client a link to update a webform)
Use Send Record Link when there is an active Record in the Workspace and you either want to partially fill in information for the client or send it to the client for the update.
- Go to the desired Record and select "Send Webform Update Link" from the Record's Action context menu.
- An email will open and you can type instructions to send to the client.
- The link to the webform is automatically embedded into the sent email.
Why is the Application Name in Red
When an Application is imported into the Workspace or deactivated, the Application name will appear in red. This allows you to review the Application, form and document to determine if you want to use it. It also lets other users in your Workspace know that you are either reviewing or working on this Application. When you decide that you do want to use this Application, you'll need to toggle the Webform Wizard and save the change.
- Click on the Application context menu.
- Select Wizard.
- At the top of the wizard there is a toggle in red the text says "(When ready, toggle to active ...)". Select the toggle.
- On the left side of the Wizard, select the disk to "Save" and then close the Wizard. The Application name updates with black text and the Application runs faster.